I currently got some problems with drilling holes again. It seems there is something odd in the Z- axis. I didn´t assembled it carefully enough. I suppose that the spindle isn´t lowered in a straight line, instead it is tilted on the way down pushing the endmill into the material sideways and ripping a hole into my plywood.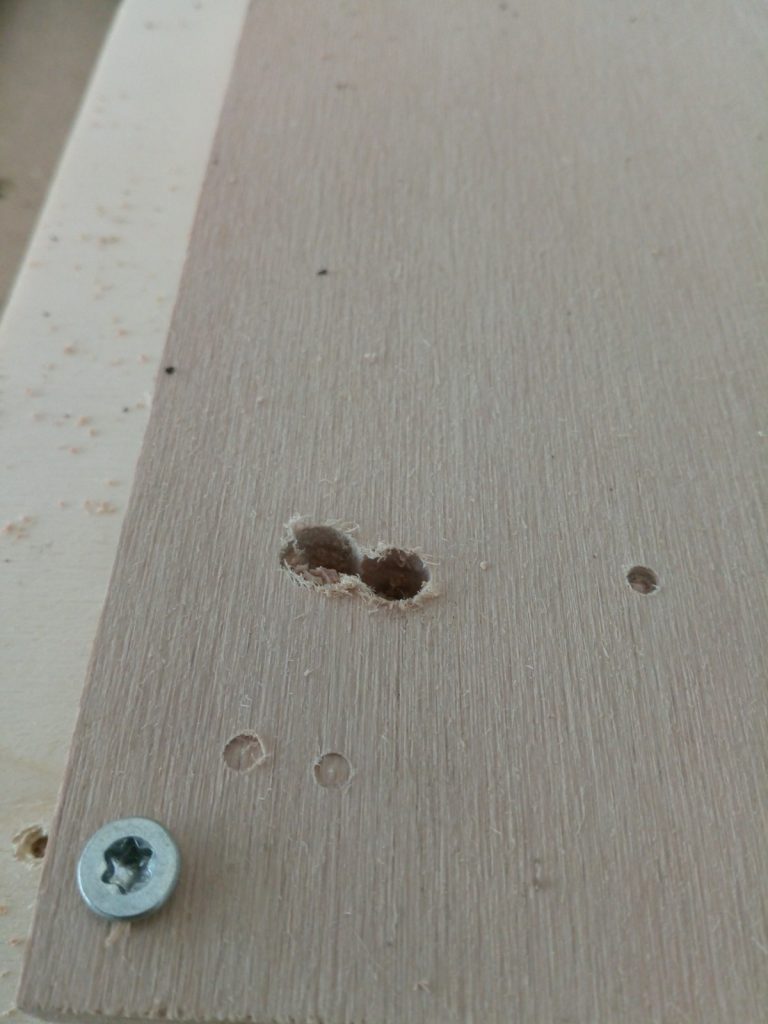
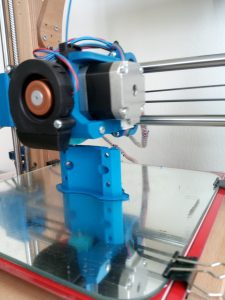
I´m using this as a reason to reprint the tool- and steppermount.
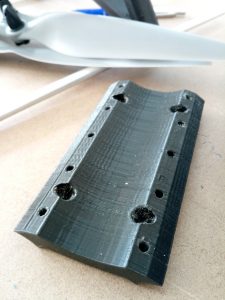
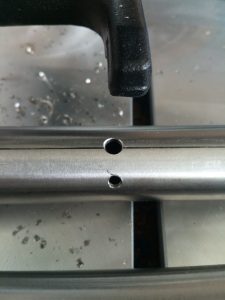
When I originally build the MPCNC I had no drillpress and the terrible idea to tap a M4 thread into the stainless. This is a bad idea as it clearly makes the alignment of the screws in the tool mount to the conduit almost impossible.
I redrilled the holes and I am now using the original path with the nut traps inside the conduit. Along with the adjustment of the leadscrew this hopefully improves the precision and rigidity of my z-axis.
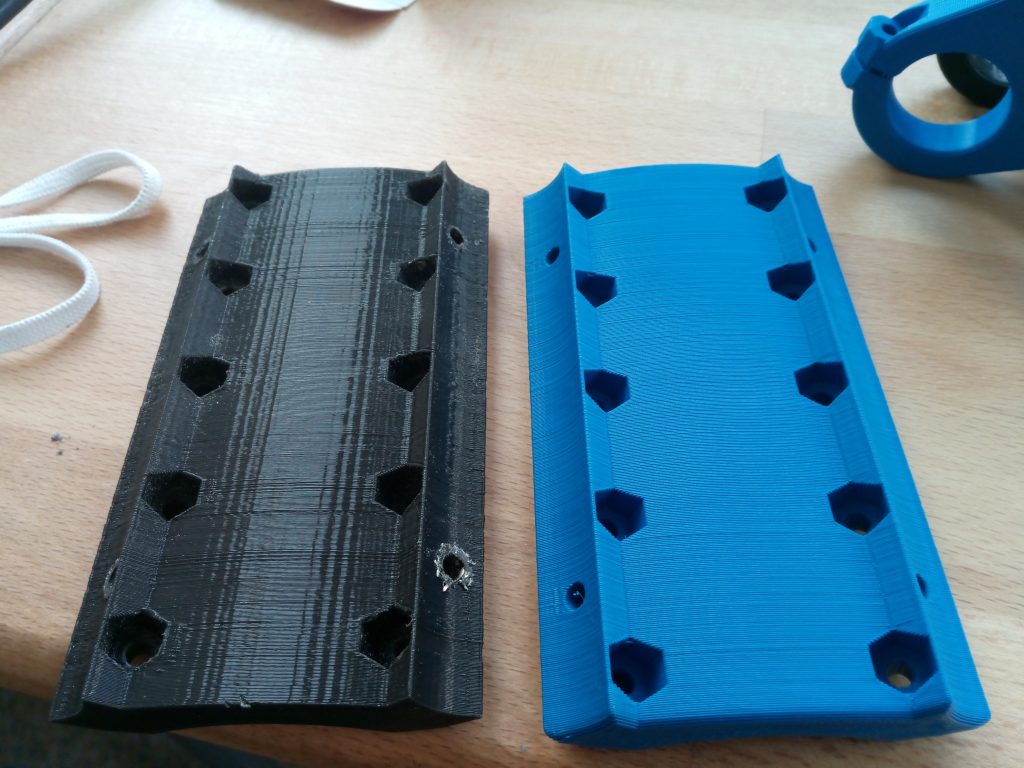
Finished toolmount replacement. The one on the left was printed with an pre R17 BCN3D Sigma and the right one printed with my DIY printer.
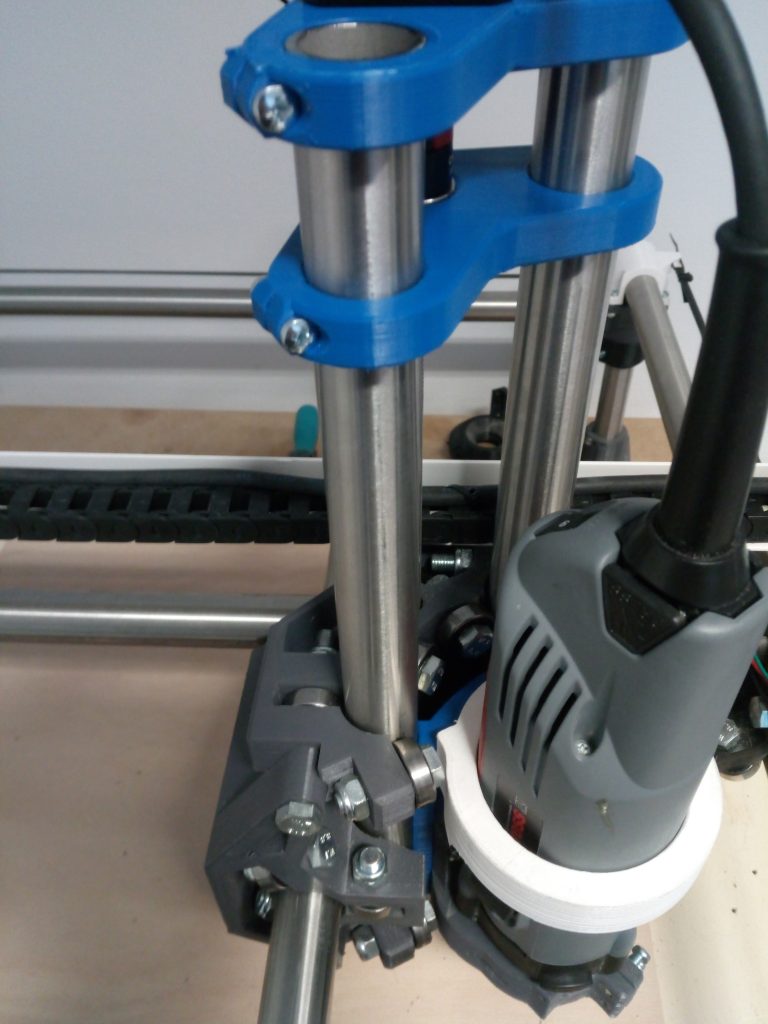 Now everything is assembled again. The tubes are now „perfectly“ straight and parallel. I used a glass plate to verify the alignment.
I did a short test run and I had the same result as before. A nice circular vibration and a not very pretty drill hole. I´m using a diamond cut endmill at the moment and went successfully through two sets of printer frames. I´ve been told in ryans formum (viscious1.com) that diamond cut bits are everything but ideal to dive 12mm into beech plywood. They are very robust so they were the only ones that survived when it came to an error. They are compressing the shavings within the hole and that leads to more and more pressure hence the heat rises and the endmill escapes in the circular movement.
In the past I ordered a endmill from sorotec which broke after some drilling operations. That left me confused what the error might be. I also tried a shorter endmill originally for aluminum which transported the shavings quiete nicely but was too short.
I ordered new endmills again and hopefully all the possible errors caused by the machine are gone and I get my drill patterns and contours out of one endmill.
Wish me luck!
Did you use the drilling templates? It is essential to drill both holes for each tube absolutely parallel. So, you start with drilling one hole (using the template), then fix the tube in the template with a matching screw, and then start the second hole.
Using the template, it would even be possible to tap the threads directly in the tubes. But the method with the holder grants more variation.
Hint: Fix the nuts with some adhesive tape in the nut holder, that makes life so much easier…and pull the screws tight only after both are sitting firmly in their nuts.
When drilling the holes in stainless steel tubes, make sure you don’t hit the inner welding seam of the tube. Turn the tube accordingly before you start to drill.
Good luck!
Thanks fo the hints!
I´ve seen the templates when I looked for a nut holder suitable for 25mm- 2mm ID. I had read the instructions from ryan again and he advised to drill bigger holes for easier adjustment. I went with 5mm and carefully marked the spot and center punshed them before drilling them on the drill press. One side came out perfect but on the other side I had slight deviations. The bigger drill hole compensated that.
It was indeed difficult to get the nuts within the holder to stay where they are. The deepenings for the nuts where too large despite the customized holder. I had to weld some pla between the nut and the part until they finally resisted the force to overcome the nylock.
I used a glass plate to get the alignment of the tubes right. Seems perfect now 🙂
I’m sorry. You have no old firmware for ramps1.4 with MK8. I can’t find an answer on the forum.
Sorry, no 🙁