MPCNC – Quickstart in DE

1. Gedanken zur Materialbeschaffung

Grundsätzlich ist es von Vorteil die gedruckten Teile sowie Fräser und Zubehör bei Ryan (Vicious1.com) zu bestellen. In die Konstruktion und den Service fließen viele Arbeitsstunden. Man sollte zumindest eine Spende in Erwägung ziehen um das Projekt zu unterstützen.
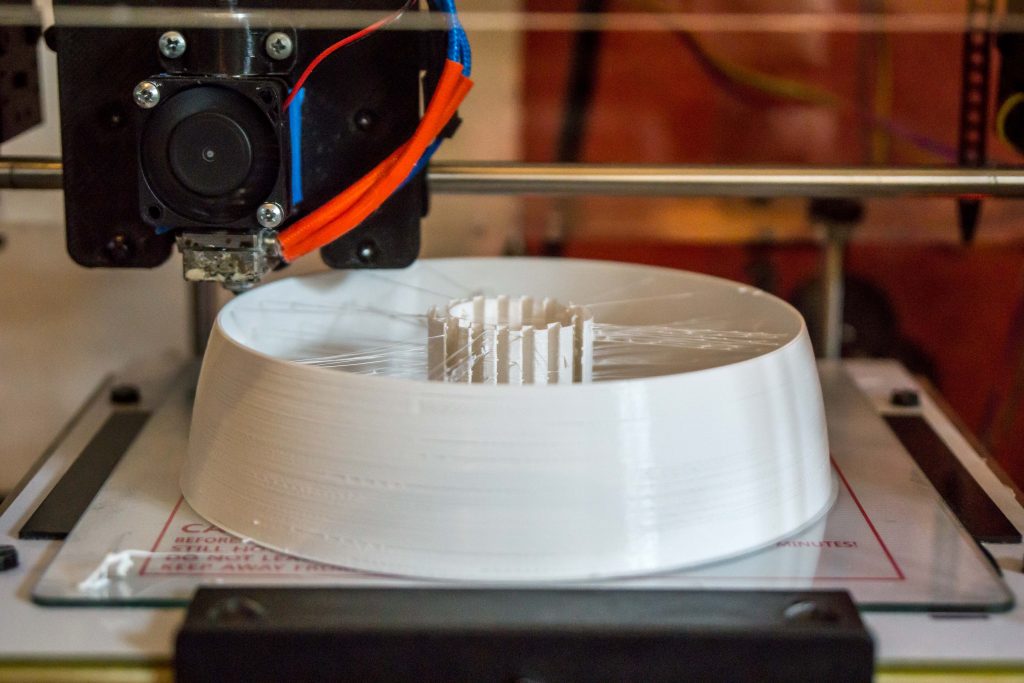
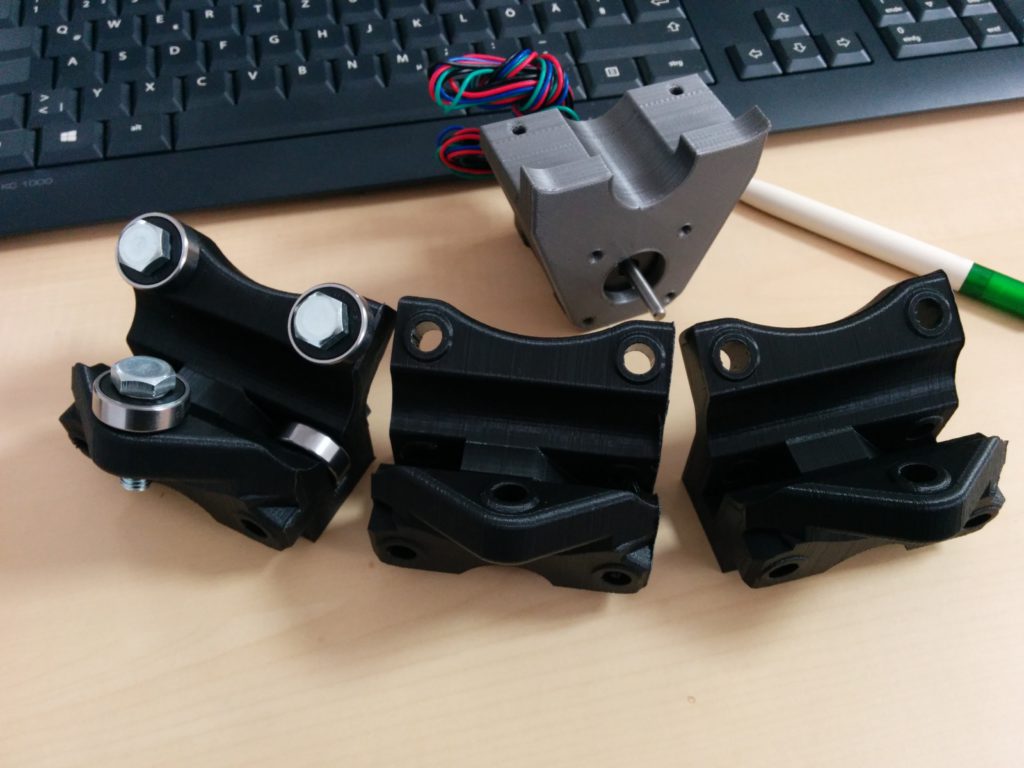
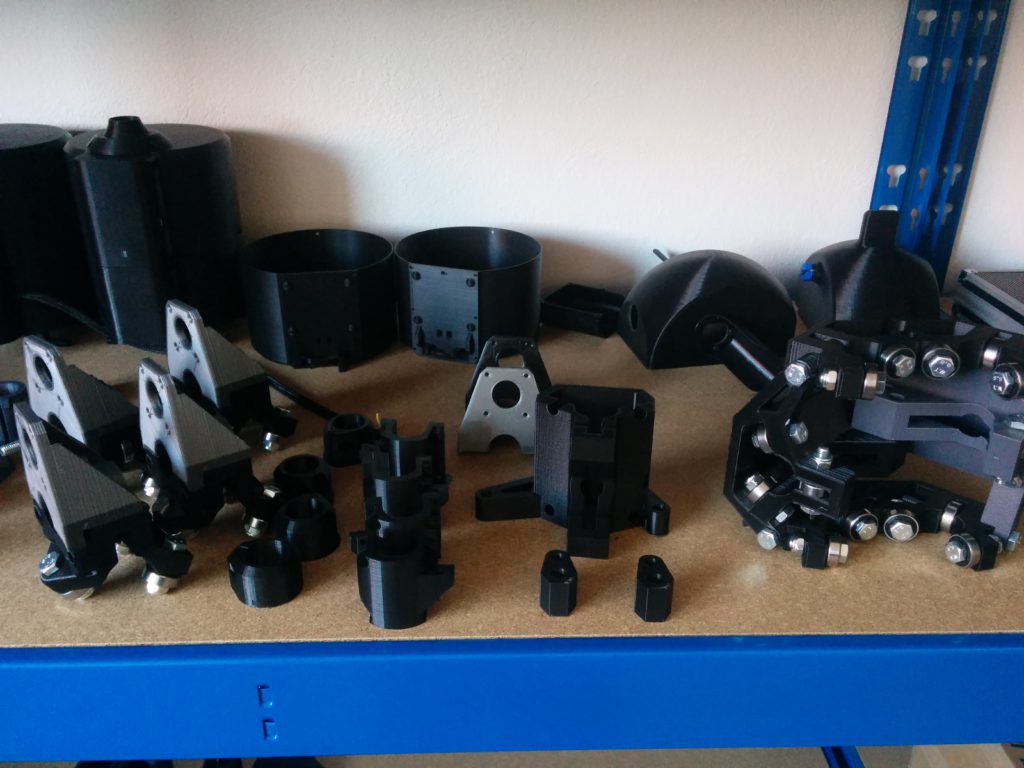
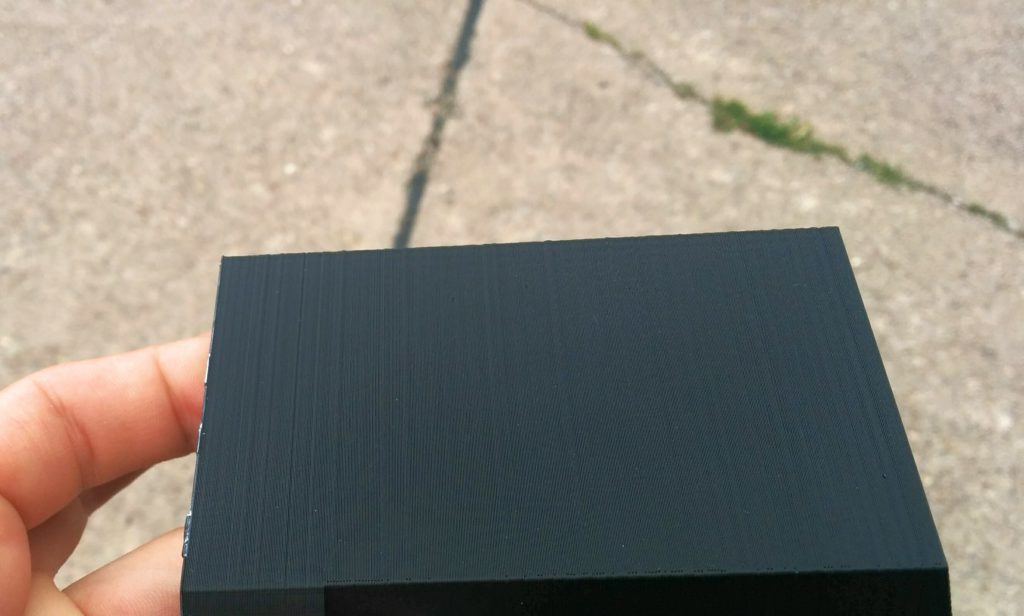
2. Druckteile

Die gedruckten Teile benötigen je nachdem was für Drucker man zur Verfügung hat und der dafür freien Zeit 1- 2 Wochen. Es ist aber durchaus schaffbar und macht einen Teil der Faszination für diesen Router aus. Die Teile sind gut konstruiert und lassen sich auf einem kalibrierten Drucker sauber herstellen, ohne große Nachbearbeitung. Gedruckt habe ich sie mit den von Ryan empfohlenen Einstellungen. Aufgrund der langen Druckzeit empfehle ich bei einer Schichthöhe von Oberhalb 0,2 mm zu bleiben. Die Genauigkeit ist vollkommen ausreichend und die Druckzeit bleibt erträglich. Verwendet hab ich PLA und PETG von „Das Filament“ genaueres dann in der Teileliste. PETG ist zwar zäher aber leider auch flexibler deswegen ist die PLA variante zu bevorzugen, wie ich später feststellte.

3. Mechanische Komponenten

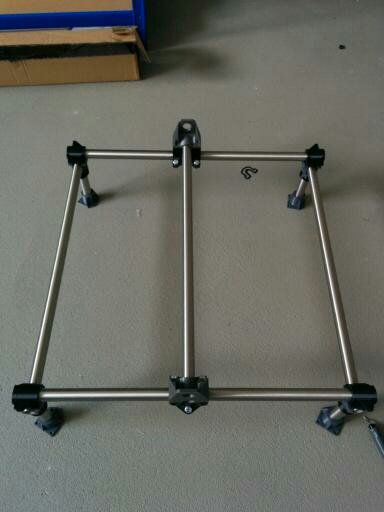
Je nachdem wieviel man ausgeben möchte kann man hier natürlich auch hochwertigere Komponenten verwenden. Ich habe mich für Edelstahl entschlossen da ich auch die Bearbeitung von Aluminium im Sinn hatte.

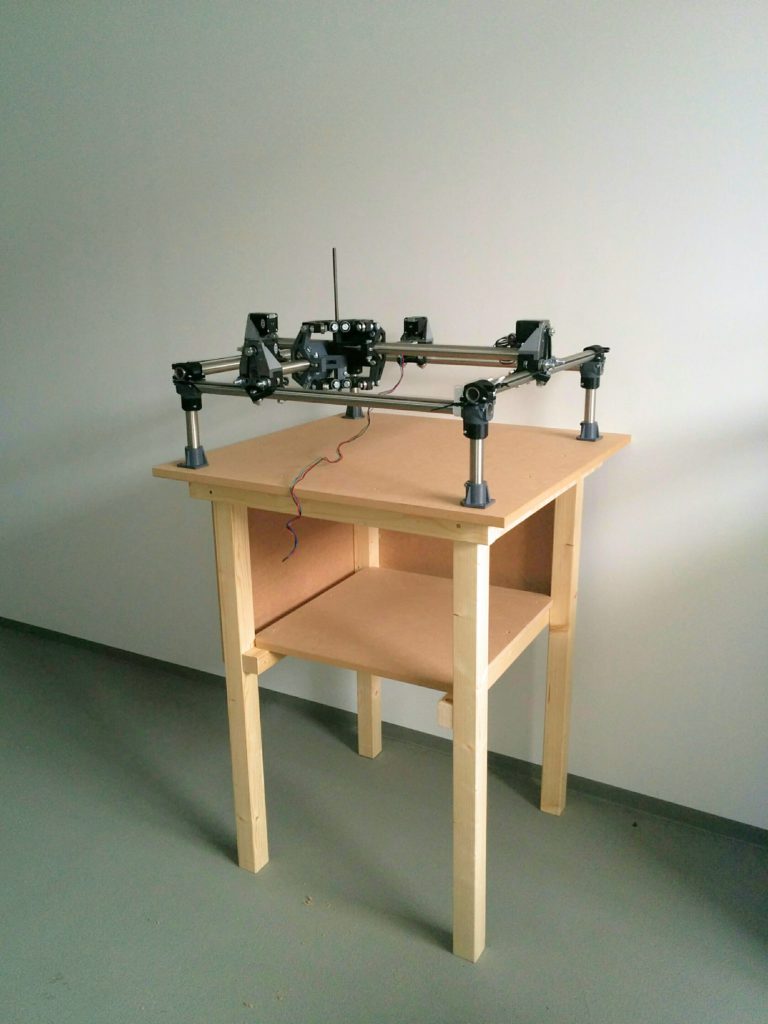
Die größe des Routers spielt eine entscheidende Rolle. Möchte man Aluminium oder Komposite verarbeiten sollte man unter einer Gesamtgröße von etwa 70 x 70 cm bleiben. Umso kleiner umso stabiler wird das ganze natürlich. Auch die Höhe wird vom angestrebten Verwendungszweck mitbestimmt. Möchte man die MPCNC als 3D Drucker verwenden ist es hierbei jedoch sinnvoll mindestens 10 cm finale Bauhöhe zu bekommen. Ich habe mich für eine nutzbare höhe von 15 cm entschieden. Um Aluminium und GFK fräsen zu können hab ich mir einen erhöhten Arbeitstisch gefertigt, der dann die Höhe zum Mittelpunkt der sich kreuzenden Streben minimiert. Die Standfüße sind natürlich dann trotzdem lang und geben etwas nach aber zumindest das Spiel im Werkzeugkopf und somit die Abweichung am Fräser ist minimiert und die Vielseitigkeit bleibt erhalten.

Die Rohrlängen können mithilfe dieses kleinen Tools ermittelt werden. Simple MPCNC Calc

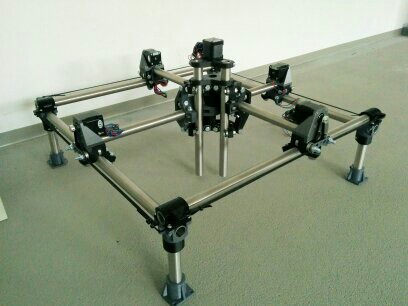
In meinem Fall hab ich also bei einer Gesamtgröße von 70 x 70 cm eine Bearbeitungsfläche von 40 x 40 cm und eine Bauhöhe von 15 cm. Meine Tests bestätigen dabei eine gute Fräsleistung sowie genug Raum um das ganze als 3D Drucker zu betreiben. Die Werte für die Rohre können natürlich gerundet werden um den Schneidvorgang zu vereinfachen.

4. Elektronische Komponenten

Ich habe die empfohlenen Steppermotoren verwendet. Da hier zwei Stepper pro Achse werkeln bringen diese ausreichend Drehmoment für alle bisher getesteten Materialien und Geschwindigkeiten mit.

Als Steuerung kommt ein RAMPS 1.4 board und ein originaler Arduino Mega 2560 zum Einsatz. Zusammen mit den DRVs ist das auch die empfohlene Konfiguration. Alternativ könnte man ein Smoothieboard verwenden welches ein wenig intelligenter beim Fräsen vorgeht und feinere Abstufungen bei runden Formen ermöglicht. Dafür gibt es allerdings keine vorkonfigurierte Firmware und auch der Preis ist logischerweise etwas höher. http://smoothieware.org

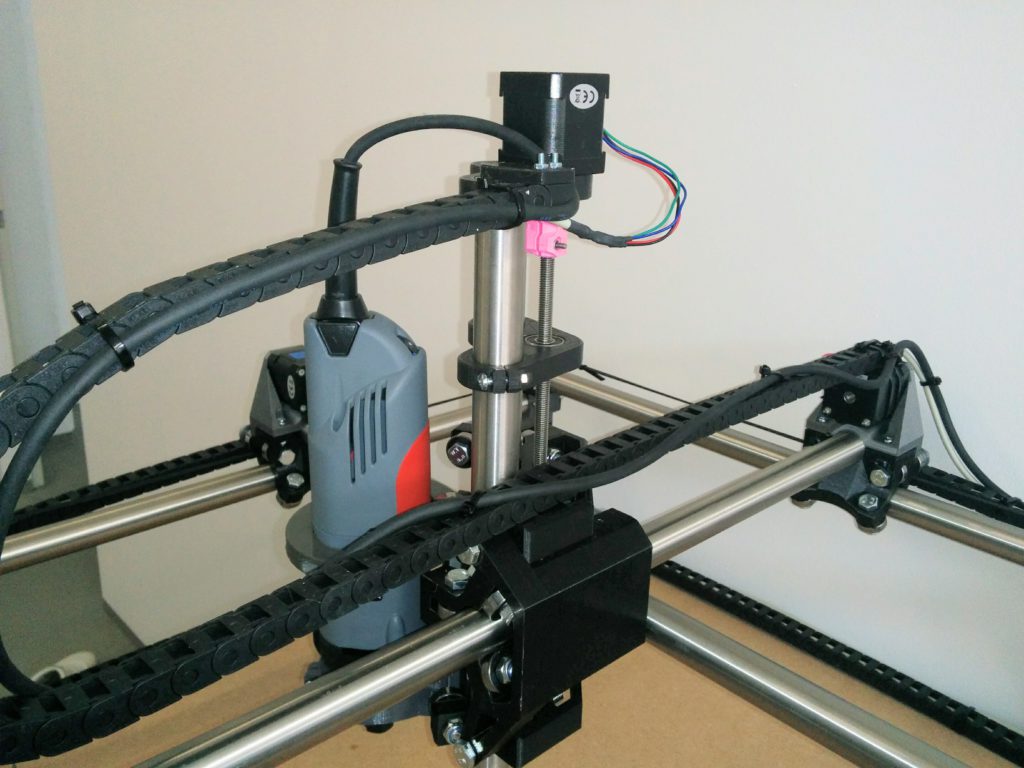
Die Kress FME 800 ist eine gute Wahl als Frässpindel. Genügend Leistung, geringeres Gewicht als bei Beispielsweise Suhner und präzise im Rundlauf. Ich hatte bisher noch nicht beobachten können das die Leistung der 800 Watt Version nicht ausreicht. Selbst bei schnellen Aluminium Schnitten ist die Drehzahl nicht eingebrochen zumindest mit den bisher verwendeten 3mm Fräsern. Die Lautstärke ist recht hoch und liegt etwas Oberhalb des üblichen Staubsaugers aber da hilft wohl nur eine HF Spindel. Zu dem Thema hatte ich mich kurz informiert und was qualitatives und halbwegs bezahlbares konnte ich nicht finden, bis auf die dubiosen „Chinaspindeln“. Dennoch scheint es eine ganze Menge Leute zu geben die mit dieser Alternative zufrieden sind.

Bei der Stromversorgung hab ich mich für die 30 A Version entschieden. Das ist prinzipiell nur nötig wenn man später 3D Drucken möchte und grössere Heizbetten verwendet. Für gewöhnlich reicht ein Netzteil mit um die 10 A (12V) locker aus.

5. Kleinteile und Zubehör

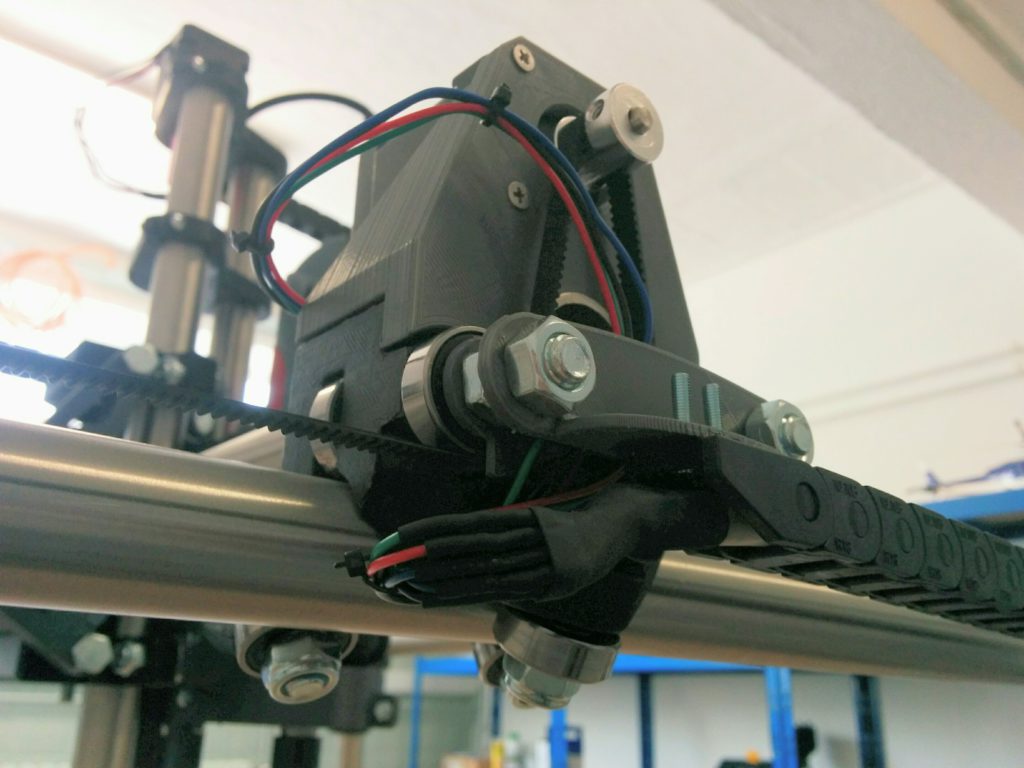
Optional aber hilfreich sind Sachen wie Endstops für Werkzeugwechsel, Energieketten für die sichere Führung der Kabel und ein LCD mit SD Karten slot für PC freien Betrieb.

6. Teileliste mit Link

Hier ein Beispiel zu den verwendeten Komponenten und wo man sie bekommt. Ich habe gute Erfahrungen mit diesen Lieferanten gemacht daher liste ich sie auf. Bitte trotzdem selbst prüfen ob die Teile geeignet sind. Dafür kann ich keine Garantie geben.

Desklamp „century“

It has been a while since the last post and the reason for that is the design and manufacturing of a desk lamp. The initial design differs from the final product as the whole process has been simplified a little. I gathered materials for three of them so the first one will serve as a production test to find out if everything fits. Once finished I am going to include the finer details.

Centuries desk lamp

The pedestal is a 3D cnc piece made from walnut here. It has been changed to a more simple round apple wood base with a 10mm phase cut with a bandsaw. Since the apple wood has a real nice grain I like it even more by now. I made three of them and one is probably going to be machined on a lathe by a friend to get closer to the intended design.

Desk lamp parts

The switch case mounted in front is going to be replaced by an inline switch, this also eases up the amount of needed prints. The joint for the arms above has been redesigned and is now clamping instead of a bolt through design with three possible positions. I have not tested yet if the clamp produces enough force to hold the arms and the lampshade with all the components. I hope this works out well.

desk lmap arm clamp and joint

The arms should be made out of aluminium and I found some nice bars I can make them of. The first step will be to mill them out of some old wood planks I got. That is a good test to see if the dimensions of the parts work together well from a design perspective. The final arms are then milled as intended when the design is validated.

The lampshade is 3D printed and adapted to a regular E14 lamp socket. The threads came out usable on first try and I will keep those first parts.

desk lamp lampshade

The project was started in july and was delayed because I had to build the MPCNC first but I´m almost finished by now. Pedestal and arms need to be cnced and some of the knobs are left to be printed.

Building a MPCNC part 3- cutting

In order to find a suitable endmill I had to understand the principles involved first. That led me to feeds and speeds. The difficult part was to determine the limits of my cnc. I already had a look on that topic when I chose my Spindle. It has a minimum RPM of 10000 and a maimum of 29000 RPM so I decided to go for a 2 flute endmill with a diameter of 3 mm from cnc-plus.de. More on the calculation later..

After testing the gcode and finding out if the steps/mm of the steppers are dialed in correctly I used a simple ruler to check. Josef Prusas stepcalculator gave me 160 steps/mm and that resulted in the correct distance of movement with my 20 tooth pulleys. As I couldn´t  set the parameters from the graphic display I had to reflash the Marlin firmware.

I used a M8 threaded rod like suggested in the original plans. It is not meant for machine operations and so It loves to do what it is designed for. It binds pretty often, resetting the z axis position and making sudden, unexpected deep cuts as shown in the video below. It is the straightest rod I could find and it is well greased but it was necessary to lower the acceleration and speed. I only had this one piece of hardwood and I wanted this to suceed. I´m trying to get the speed back up again because the milling took ages (1h15min) because of the adaptive clearing and the many retractions of the tool head.

The 3D printed rigid couplers didn´t worked to well for me so I ordered a jaw coupler also from http://cnc-plus.de to make it more reliable.

In conclusion : I liked the results of the cuts and they were somehow thrilling. The accidentially super deep cuts showed that I can go much deeper than 3mm in one pass with hardwood. The method used here was also a test for the ultimate goal for cutting alumium sheet and composites.


Building a MPCNC part2

So I spent some hours on weekends to advance further into my CNC adventure and it came out pretty satisfying.

img_20160916_170838

Simple CNC stand

Before wiring everything together, I saw the need of a good platform, so I don´t have to wire it again once I found a suitable platform. It took around 6 hours to build this from standard „Baumarkt“ supplys.

img_20160922_1536352

I guided all six cables per axis down to the controller board. I wasn´t sure If I might change the controller board and thus the method of actuation later. I used 8 pole shielded datacable from Lapp Kabel. I added some endstops after I ordered the cables so I have to wire them seperetaly.

img_20160922_153656

Z Axis with Kress FME800 and a pink solid coupler

The M8 threaded rod wasn´t straight and wobbles badly so the Z Axis binds from time to time when running. I´m going to change that for a trapezoidal screw soon. The printed rigid coupler also starts to crack. I need a better part for this too.

Everything else works good so far. The Stepper drivers are getting a little hot but I got a small fan as a leftover from my Fabrikator mod that will be mounted on a 3d printed case or similar.

img_20160922_153710

Complete setup with vacuum and cablework done

Getting endmills and doing the first cut is the next target,


Building a MPCNC

I started building a MPCNC router after I stumbled upon vicious1s design on thingiverse. I really liked the design and couldn´t resist to start ordering the electrical parts and the required conduit.

MPCNC Rollers

MPCNC Rollers and first stepper mount

I took pretty long to get all the parts printed correctly, as my printer was modded right before the prints and it wasn´t to clear how it will perform. The MPCNC prints served well as a long time test of the modifications

Almost complete

Almost complete

I quickly assembled the parts I had so far to see what it gonna look like

1471636054102

First test fitting

All fitted very well, the conduit is stainless steel whitch came pre cutted. I needed to source some screws I had to use M4 for the most parts as M3,5 as suggest by Ryan was harder to find. After I got them it didn´t took long to get the majority of the CNC parts together.

1471701993534

Assembled stage 1,5

Great moment for me, as I coulnd´t stop thinking about anything else than finishing this nice little machine up. I made it 70 x 70 cm resulting in a build volume of around 40 x 40cm x 10 cm.

Next steps cover the electronics, base plate and the spindle. I will go for a Kress FME 800.


Turnigy Fabrikator E3D – mod

When Hobbyking lowered the price for the Turnigy Fabrikator I couldn´t resist any longer and decided to take the risk of ordering. The build up was pretty straight forward and I had it up in like 8 hours. I did a little calibration and and added a rapsberry pi with octoprint to the setup in conjunction with cura. Everything worked pretty well, especially the leveling of the print bed which was a one time setup thing. Printig was pretty much fire and forget and overhangs came out pretty well. However…

The print quality was ok but I never was too impressed with the layer alignment so I decided to do a little upgrade on the extruder with an original E3D hotend and a bowden mod.

I used a modification already available on http://www.thingiverse.com/thing:1534340 by Manuel Stassar. I recycled the old Extruder mount to use it as bowden extruder to keep it simple (lazieness). The prints seem to be much better now but I have to test it more.

IMG_20160809_173142~2

Much better layers


Q3 – „Mini Ghost“

I discovered the magic of 3D printing as many RC fans did. The possibilities went straight up and a custom copter design was the inevitable next step after the tricopters.

The purpose of this development was to gain knowledge in design and material strength and of course the fun factor to have a small FPV vehicle, inspired by the recent 250 race class. The focus wasn´t race performance as a CFK plate build is just more rigid than PLA. Instead I wanted more flight time to cruise around, or as base for more scientific operations such as mapping or inspection. The flight time happened to be around 17 minutes with a standard FPV cam, so I considered the whole construction as a success, regardless of the problems I discovered during testing..

I liked the idea to have an „exoskeleton“ , which is nothing new as this is standard in aviation and DJI phantoms or Microdrones etc build upon  that concept. The main advantage seemed to be the more integrated look, aerodynamic, no need for CFK plates, complete in home production except for the electronics which led to more freedom from suppliers at least for the frame, protection for sensitive electronics inside and last but not least, freedom of design.

V1

The first complete design relied on CFK or alu tubes

To ease up the printing process, the frame needed to be simple. Luckily my printer was able to handle all shapes without to much support material. The canopy can be printed completely without support. However the arms in V2 are a little complicated as they are hollow and the print tends to deform but it came out good enough for the first complete prototype.

V2Render

V2 Mini Ghost with more space inside and printed arms.

Time to print!

IMG_20151025_093747_042

V2 in reality with added minimal landing gear and all the equipment

The print quality needs to be improved further. After a series of print tests I managed to link the suirface irregularitys to the z lead screw, as all of my prints tend to have the same banding pattern. Nevertheless, I could do some test flights indoors and it worked for now. I revealed some problems during these tests which need to be adressed.

  • The canopy mount was designed to be some kind of click mechanism, so it came loose because of heavy virbrations and the propellers shredded it while the whole copter dropped veticallly. I redesigned the mechanism and it is held in place with M3 nylon screws now. Much better with a safer feeling :).
  • I was unable to balance the props, because they are to small to fit in my balancer. They led to heavy vibrations around a certain RPM and..
  • Two arms were damaged close to the motor mount. I changed the design to something more fluid in this area and raised the infill to 30%. Also they were glued in originally and this has also been redesigned to a more interchangeable screw design.

Things to do:

  • The landing gear mount needs a overhaul as well. They weigh 2g each and softened the vertical drop pretty well but that was from 1m and the lipo is quiete heavy compared to the frame itself.
  • Print the updated parts

T2 „PHAD“ Plant Health Access Drone

As a result of the lack of usefulness of the first build, I decided to build something that collects some serious data. Pictures, at waypoints, vertically. More comlicated than expected but again a good place to learn something. I included a raspberry pi in a later stage and connected it to the multiwii board with a serial connection. I needed to learn python to get some more versatile functions out of the copter which took a while.

T2 first flight test

First flight testing without the companion computer

The flight time was 15 minutes as calculated with a 4s 5000 mAh lipo.

T2 with added companion

T2 with added companion and lots of LEDs 😀

The Multiwii Serial Protocol was hard to understand at first, so I had to learn the basics of a serial communication as well. The raspicam was triggered everytime the waypoint changed in the protocol. A simple python program listened to the waypoint message and triggered the cam accordingly.

I wasn´t able to finish this project as I entered the commercial UAV market. Next steps would have been image stitching and index calculations etc. Thats why it had it´s name originally.

T1 Tricopter

My first attempt at building a tricopter. It was meant to be as cost effective as possible and was equipped with a beastvision later on. It was controlled with a KK board, pretty much the simplest solution I could find. As ESCs I used the ones from my KDS helicopters, but that didn´t went out that well because one of them were different so the RPM were set incorrect for a stable hover even after multiple calibration attempts.

T1 - Tricopter

The wooden frame with alumium arms before the electronic were connected

The most delicate part was the build of the yaw mechanism. I ended up using a blade grip from a 450 RC Helicopter. That was glued in together with some bearings into the aluminum arm.

Yaw mechanism Tricopter T1

YAW Mechanism with zip tied servo

It came out like this after all components, including a flycam, were mounted. It flew pretty well but wasn´t very useful.

First Version with recycled components

First Version with recycled components

I added a better camera and protected the flight controller with a second deck made out of plywood.

Front view with Exilim z1080

Front view with Exilim z1080

This was tmy first step into the multirotor universe, with nothing magical involved. I learned quite a lot from this and it was even used to shoot some footage of a flood and some drfiting action. The lack of a gimbal and the very basic flight controller made it difficult to gather good video material.